Download / Flash
Downloading the Software
In this section you find the latest ready-to-use RaspiBlitz SDcard images. Basically you just download, write/flash the image file to an sd card and start your Raspberry Pi with it - its the same for first install or updating to a newer version. You can choose from two ready-made sd card images below.
Once you update to RaspiBlitz v1.12.0, you cannot revert to an older version because the SSD/NVMe data layout changes and is no longer compatible with older versions.
FATPACK SD Card Image (Beginners - WebUI)
This is the sd card image you should choose if your at the beginning of your RaspiBlitz journey or you are a casual node runner wanna download the next update/upgrade - with WebUI & fast installing bonus apps.
- FATPACK SD CARD IMAGE ⮕ raspiblitz-fat-v1.12.0-2025-09-26.img.gz
- SHA-256: 5b65467c899947748a7c7812d89d24673817067812acb275f9902bcd03a280e6
- GPG 64-bit (main): 1C73 060C 7C17 6461 & (sub): AA9D D1B5 CC56 47DA
- Signature-File: raspiblitz-fat-v1.12.0-2025-09-26.img.gz.sig
- Torrent: raspiblitz-fat-v1.12.0-2025-09-26.img.gz.torrent
- How to verify the SD card image after download?
MINIMAL SD Card Image (Experienced Users - SSH)
This is the sd card image for RaspiBlitz users that are already more experienced and want to use just a limited set of features of the RaspiBlitz. This image has just the bare minimum of features pre-installed - LCD & HDMI output is off by default. Setup, Update or Recovery needs to be done thru SSH login - API & WebUI are later available but are not pre-installed/activated by default. The RaspiBlitz will download & compile just the tools that are in your ´raspiblitz.conf´ - this will take longer but as a trade-off this RaspiBlitz then just runs with a reduced set of dependencies and so a minimized attack vector and better performance. Its for the serious & experienced node runners.
- MINIMAL SD CARD IMAGE ⮕ raspiblitz-min-v1.12.0-2025-09-26.img.gz
- SHA-256: 6b0fb38132b66b79255efd34b2a387ee8418787cfa3f5ff9e8821735101866d2
- GPG 64-bit (main): 1C73 060C 7C17 6461 & (sub): AA9D D1B5 CC56 47DA
- Signature-File: raspiblitz-min-v1.12.0-2025-09-26.img.gz.sig
- Torrent: raspiblitz-min-v1.12.0-2025-09-26.img.gz.torrent
- How to verify the SD card image after download?
Write the SD-Card image to your SD Card
You need to write the downloaded SD card image (the img.gz-file) to your SD card (64GB minimum) - you can use the very easy tool Balena Etcher for this. It's available for Win, Mac & Linux.
Boot your RaspiBlitz
Insert the SD card and connect the power plug.
- Make sure to connect the raspberry with a LAN cable to the internet at this point.
- Make sure that your laptop and the raspberry are on the same local network.
Troubleshoot:
- I don't have a LAN port on my Laptop - how to connect to my RaspiBlitz?
- Is it possible to connect the Blitz over Wifi instead of using a LAN cable?
- Can I directly connect the RaspiBlitz with my laptop?
- I connected my HDD, but it still says 'Connect HDD' on the display?
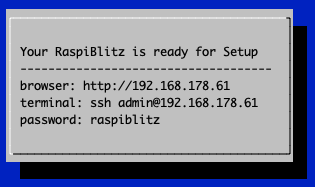
When everything boots up correctly (one reboot is normal), you should finally see the local IP address of your RaspiBlitz on the LCD panel.

Now open up a terminal (OSX/Win10) and connect through SSH with the command displayed by the RaspiBlitz:
ssh admin@[YOURIP] → use password: raspiblitz
To follow the setup dialogue in your terminal you can continue with chapter Basic Setup.